Build a chatbot to check live flight status
Create a Power Virtual Agent with AviationStack API
In this blog, we will
Create a Power Virtual Agent Chatbot
Call a cloud flow with AviationStack connector
Check live flight details
Take the API response and return to PVA as an adaptive card
This is a step-by-step hands-on guide. You can also check out my YouTube video to follow.
Let's get started:
Power Virtual Agent Part 1
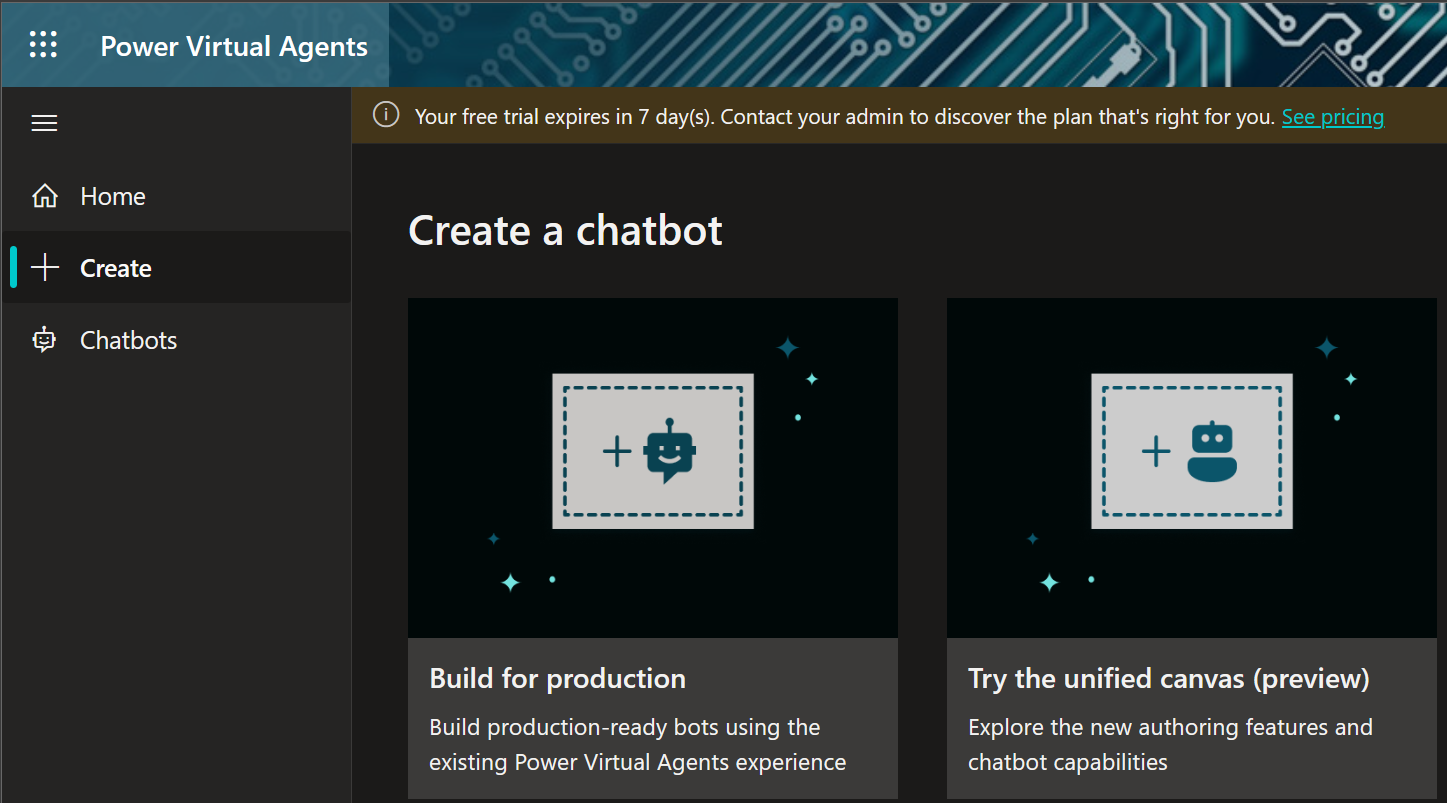
Create a preview bot with unified canvas, and give it a name.
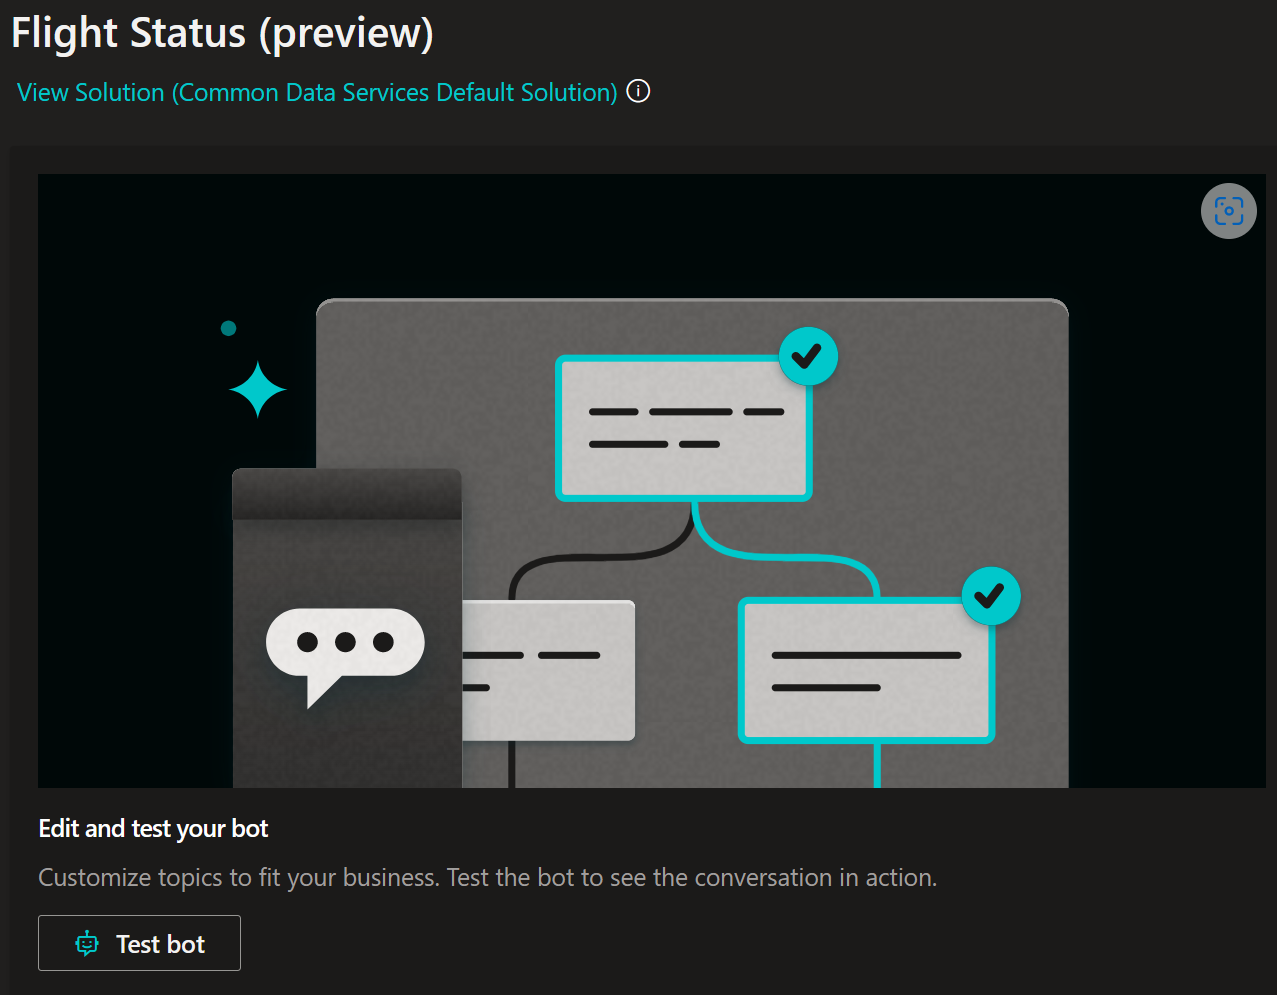
Select "Test bot" to edit the Topics.
Switch off all the training topics.

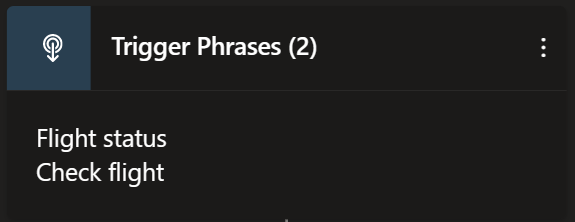
Create a new topic with very simple trigger phrases.
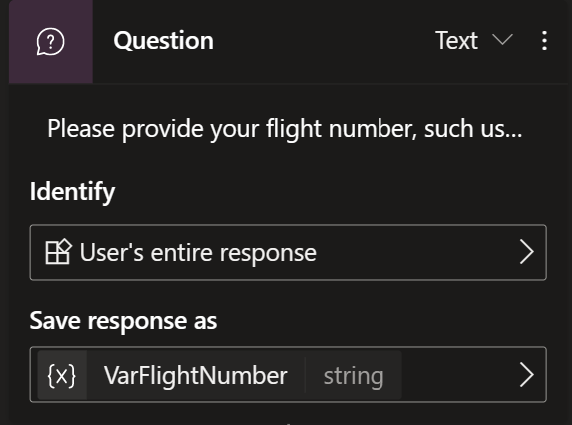
Add a node to ask the user to provide the flight number. Take the user's entire response and store it in a variable called VarFlightNumber.
Add a node to call an action to create a flow, it will take you to the Power Automate portal, make sure you are already signed in.
AviationStack API
In Power Automate, add a new step to connect to the AviationStack connector, use the "Get flights" action.

If this is the first time you use its connector, you will need to provide an API key. Create a free account with AviationStack to receive a basic plan.
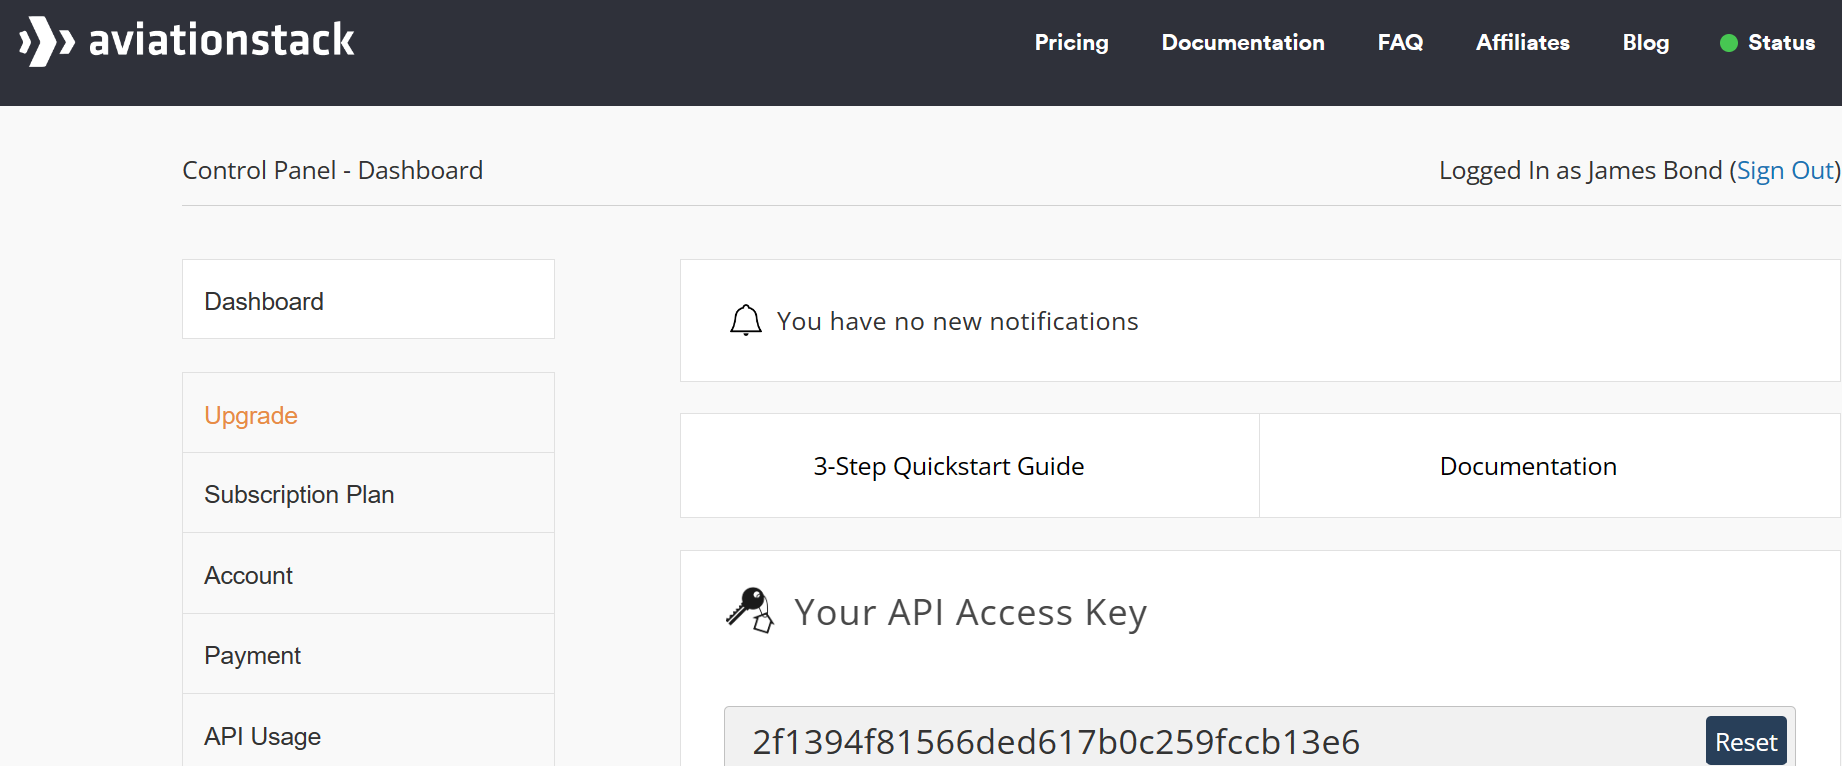
Please check AviationStack documentation for usage details.
I need to point out that the flight number that people normally use, for example, QF737, is called flight IATA in aviation.
To avoid confusion, in the PVA, we will still ask the user to provide a flight number and expect the input will be something like QF737.
Then in the flow, we will assign this variable to the flight_iata parameter instead.

Power Automate Cloud Flows
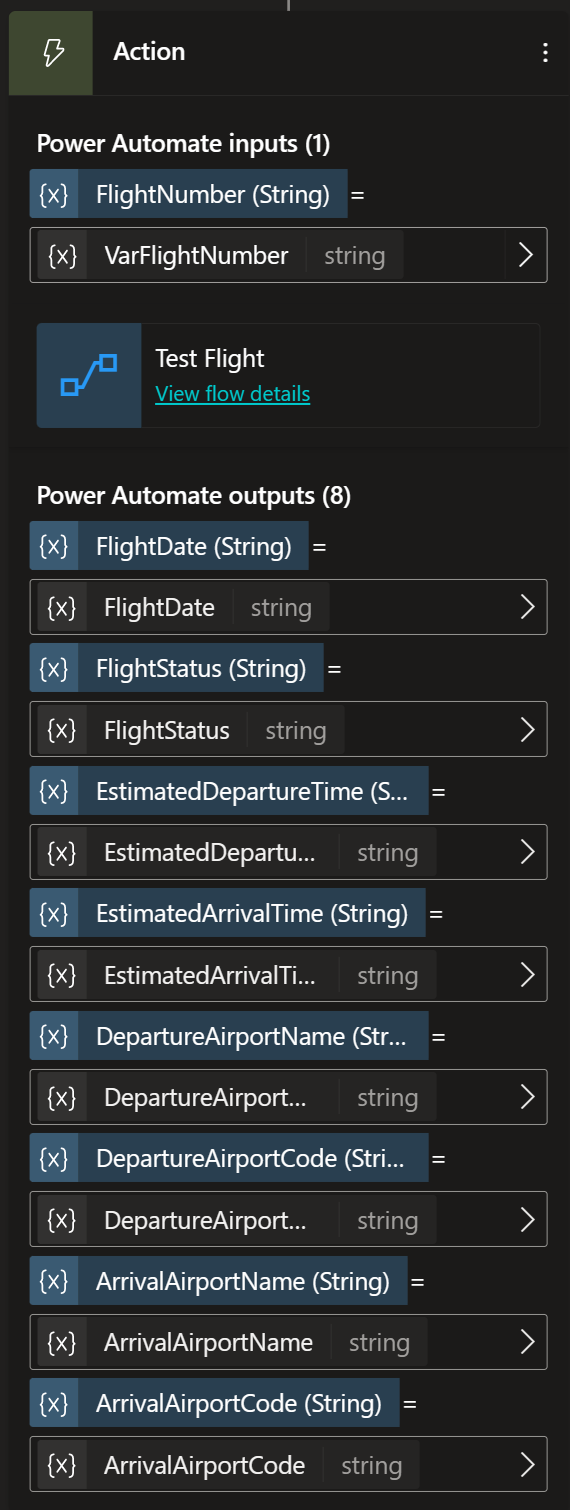
Back in Power Automate, create a variable named "FlightNumber" to be used in the "Get flights" action in the "Flight IATA" field as a filter.
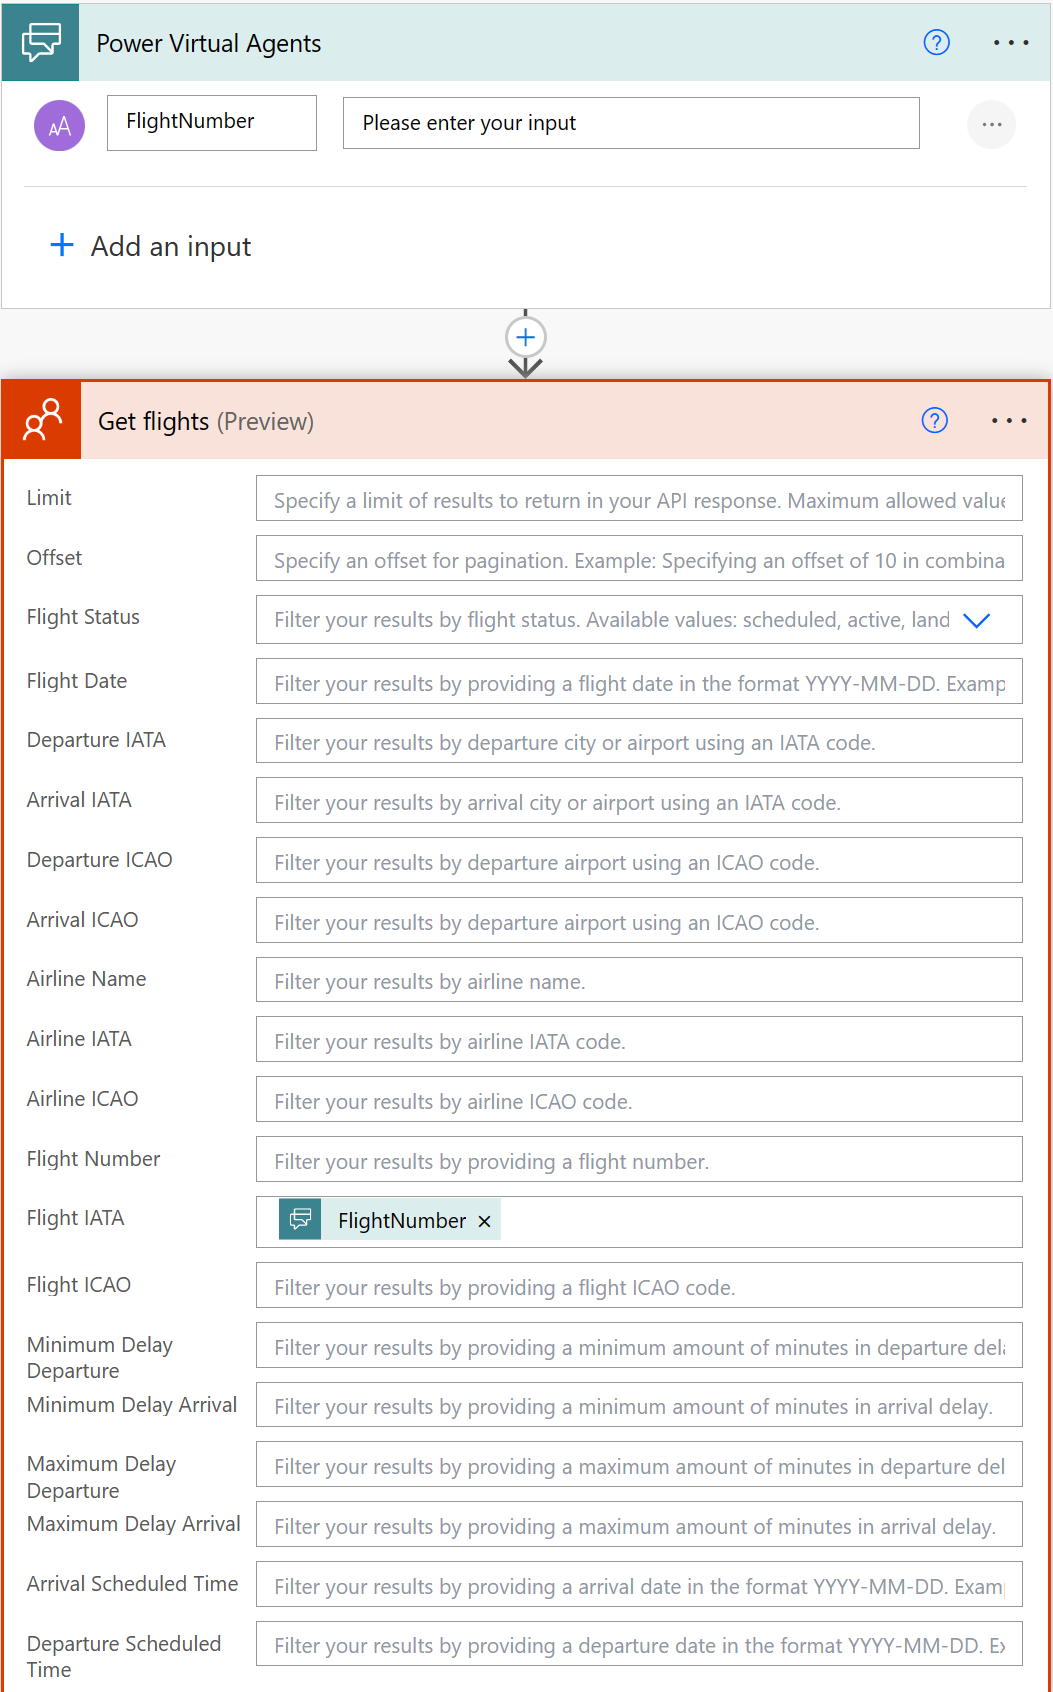
When the AviationStack API is called, it will return live information of all the flights around the world.
To reduce the information returned to your app, you can put a limit on returned results (100 by default if you leave it blank). Then you can apply other filters to further limit the responses.
In our case, we use the "Flight IATA" to reduce the returned results to one flight only. Because the basic API plan does not support historical information, it will only return one current flight information.
The FlightNumber variable in the flow will take the value of varFlightNumber variable in the PVA, which you will see in the later steps.
The final step in the flow is just to pass the API response we need as variables back to PVA.
On the left are the names of the variables going back to PVA.
On the right are the Power Fx formulas to parse the API response to the format we want.
I have chosen these variables based on the adaptive card I would use later.
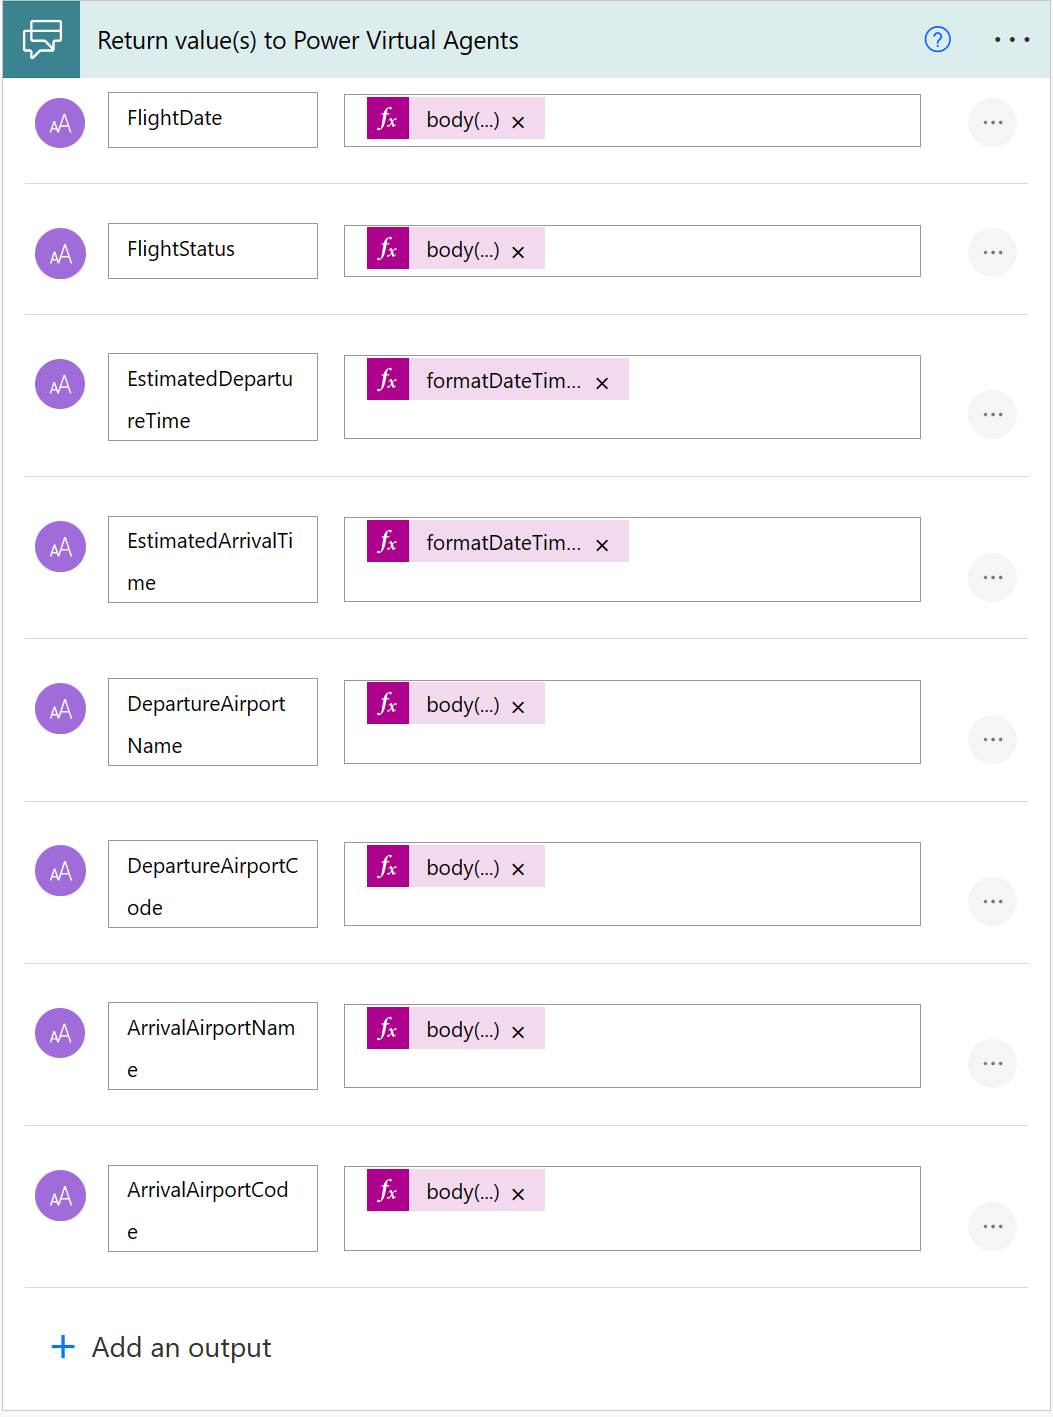
Here are the variables and expressions used
Use "body" reference function under the expression to avoid "For Each" loop.
Do not select dynamic content.
Check out @benitezhere's blog for details on how to avoid "For Each" loop.
FlightNumber (PVA)
VarFlightNumber
FlightDate
body('Get_flights').data[0].flight_date
FlightStatus
body('Get_flights').data[0].flight_status
EstimatedDepartureTime
body('Get_flights').data[0].departure.estimated
EstimatedArrivalTime
body('Get_flights').data[0].arrival.estimated
DepartureAirportName
body('Get_flights').data[0].departure.airport
DepartureAirportCode
body('Get_flights').data[0].departure.iata
ArrivalAirportName
body('Get_flights').data[0].arrival.airport
ArrivalAirportCode
body('Get_flights').data[0].arrival.iata
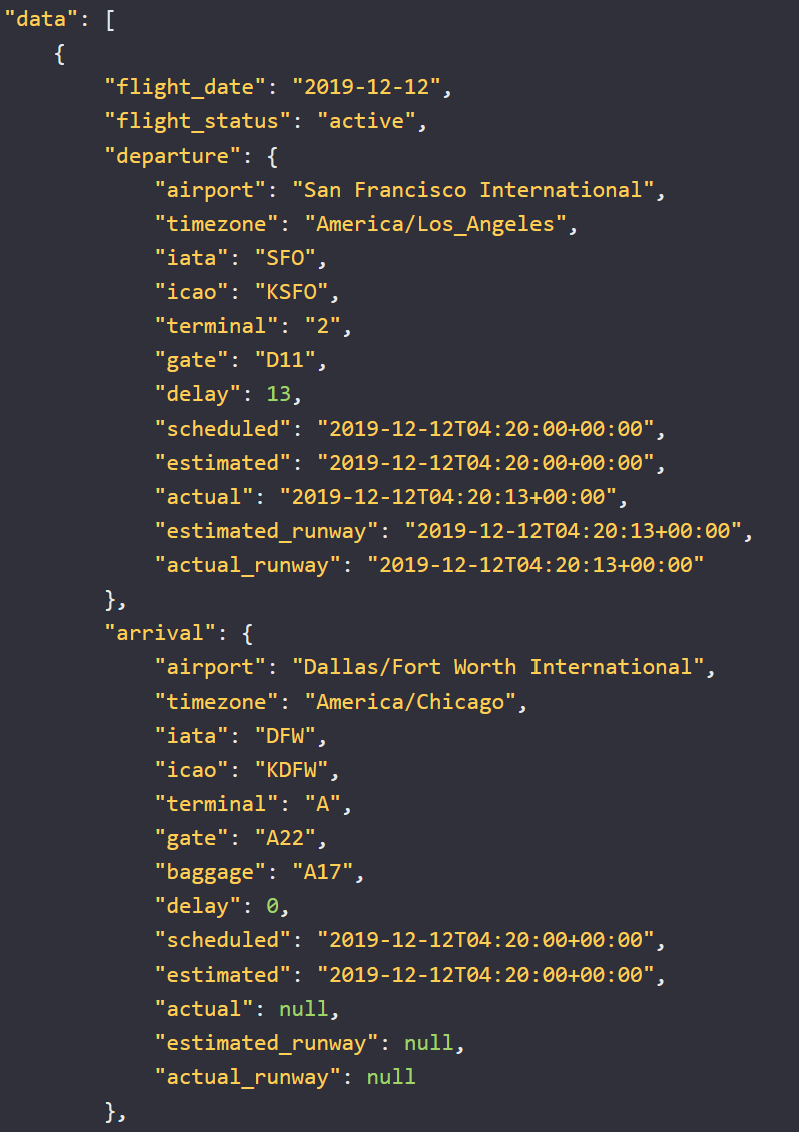
You can check the API Response example below to see how they are matched
Save the flow and you should be back at PVA.
Power Virtual Agent Part 2
In the Power Automate inputs, equal the flow variable FlightNumber to the PVA variable VarFlightNumber, which is the user input.
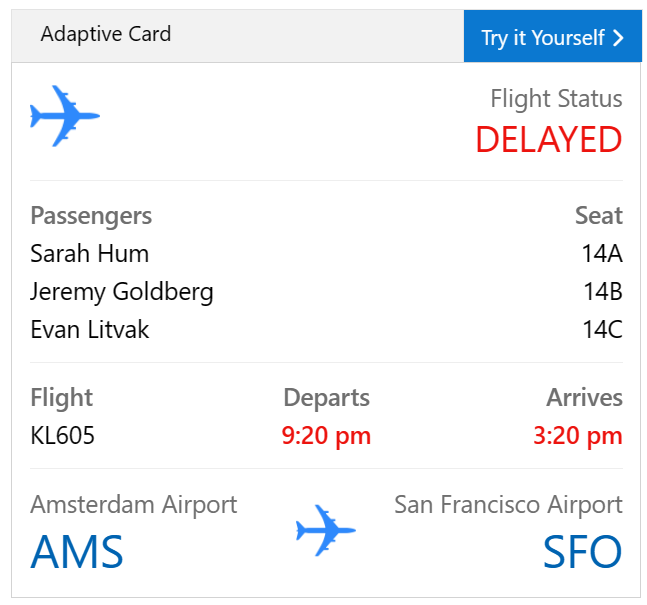
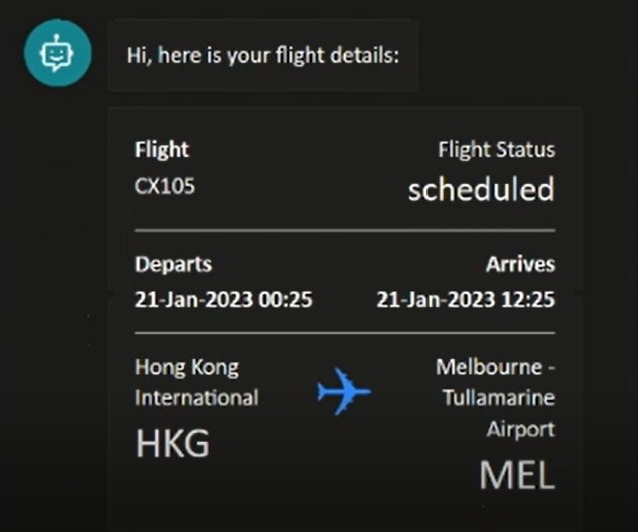
All the flow output variables are passed back to the Chatbot and ready to be used. Add a new message with an adaptive card.

Add a simple message and select "Media", you can see the JSON sample on the right. Expand the JSON window.

Next, we will explore the Adaptive Card and modify a template.
Adaptive Card
Go to Microsoft Adaptive Cards and select "Samples".
Find something you like and select "Try it yourself".
It will take you to the code editor. Change the Target version to 1.3.
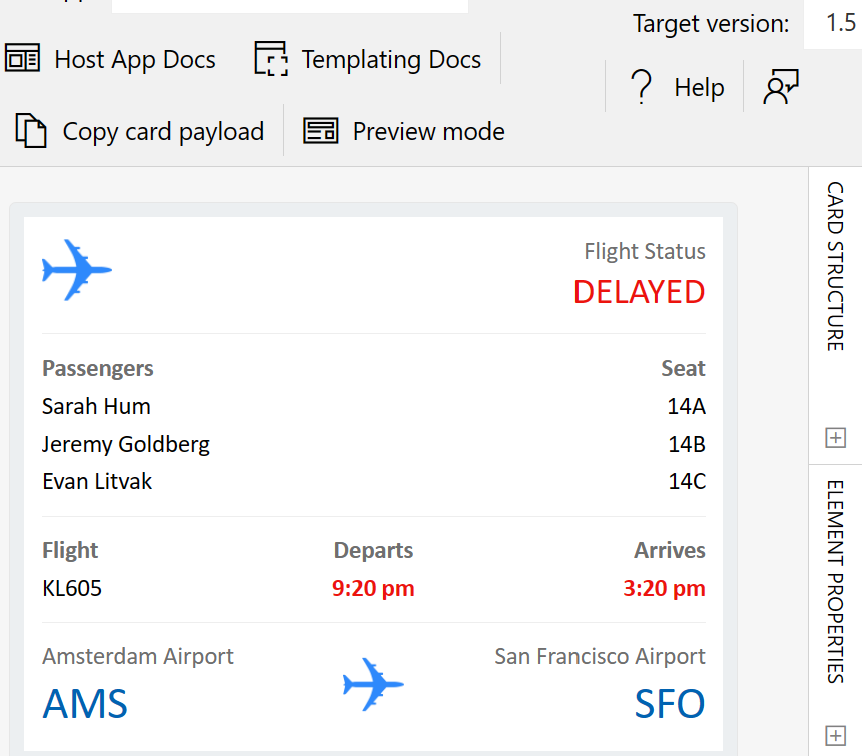
I removed the "Passengers" columnset and also changed the layout a little. The code will automatically update and data binding is not affected.
Select "Copy card payload".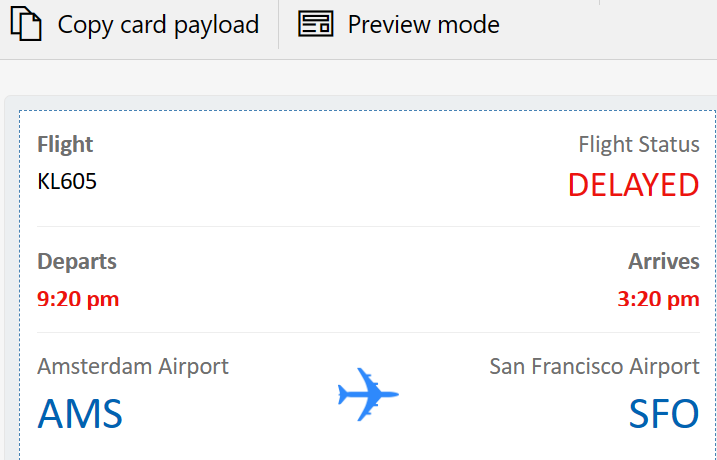
Power Virtual Agent Part 3
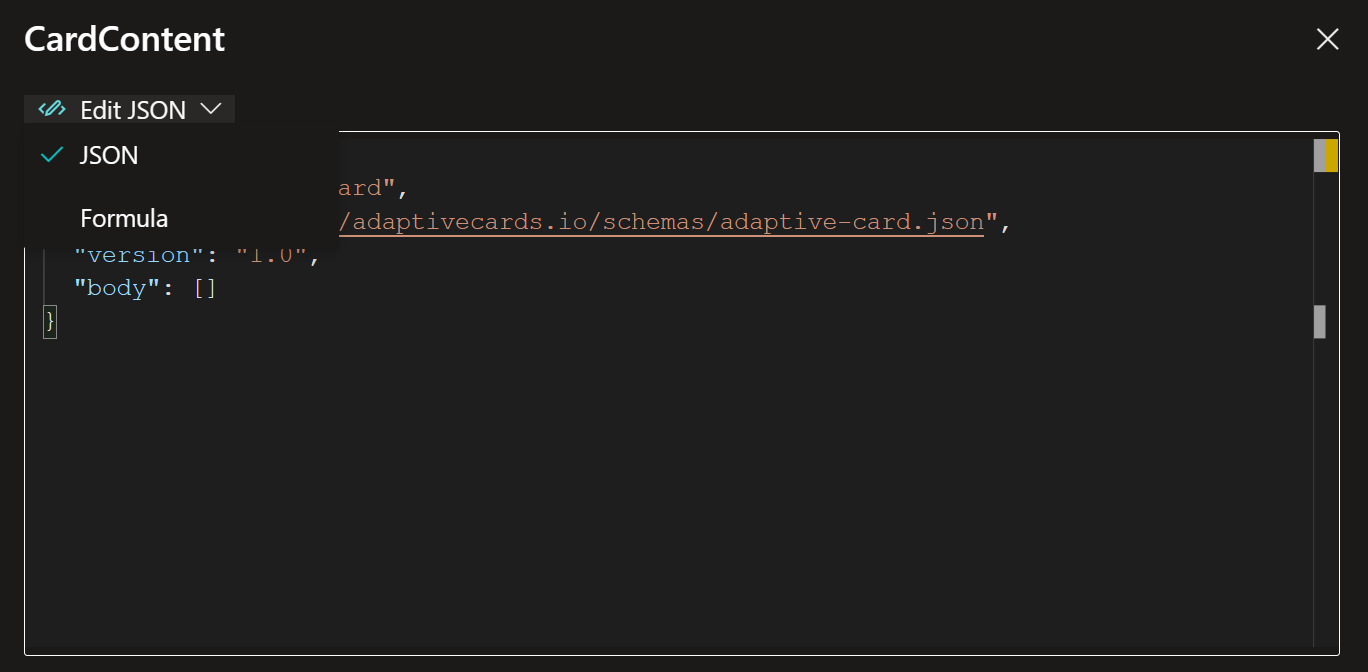
Back in the PVA, go to Adaptive Card's code window, delete the sample code, and paste "card payload".
Select the dropdown menu and change to Formula
Important!
Paste the JSON code first and then change it to Formula
Do not reverse the order! The editor can be buggy.
Next replace all the hard-coded value with variables by using Power Fx. This will ensure the adaptive card will take the variables returned from cloud flow.
For example, find
text: "San Francisco Airport",
and replace with
text: (Topic.ArrivalAirportName),
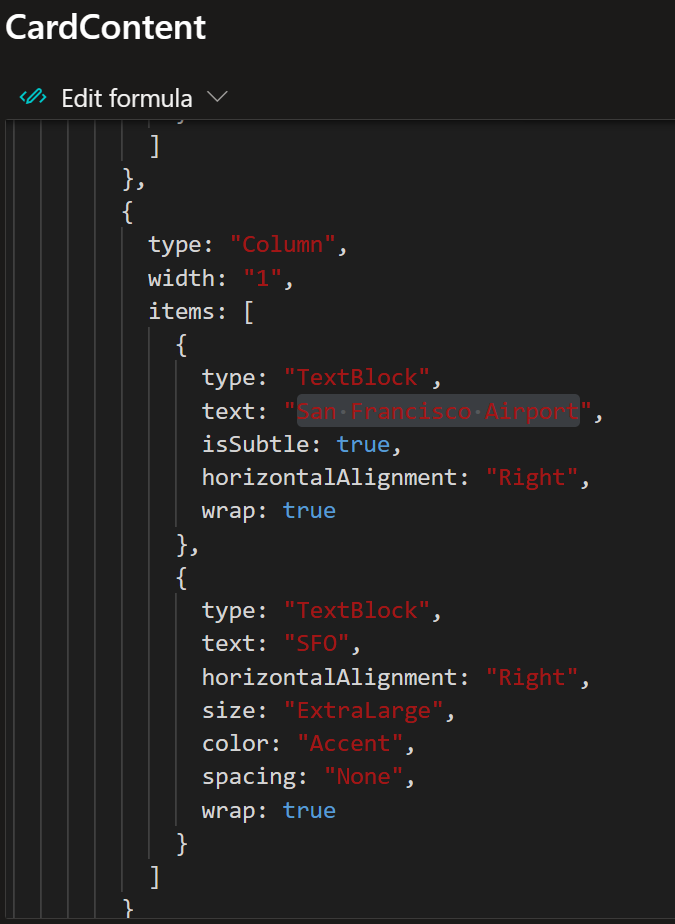
Here is an example of all the variables that need to be updated on the card.
(Topic.FlightDate),
(Topic.FlightStatus),
(Topic.EstimatedDepartureTime),
(Topic.EstimatedArrivalTime),
(Topic.DepartureAirportName),
(Topic.DepartureAirportCode),
(Topic.ArrivalAirportName),
(Topic.ArrivalAirportCode),
Save and you are ready to test the bot.
The data/time format in API response is not adjusted to your locale.
It looks like this: "estimated": "2019-12-12T04:20:00+00:00",
To return the local time to the adaptive card, use the "formatDateTime " expression in the flow:
formatDateTime(body('Get_flights').data[0].departure.estimated, 'dd-MMM-yyyy HH:mm', 'en-AU')
The last part next to the close bracket is your locale (en-AU).
